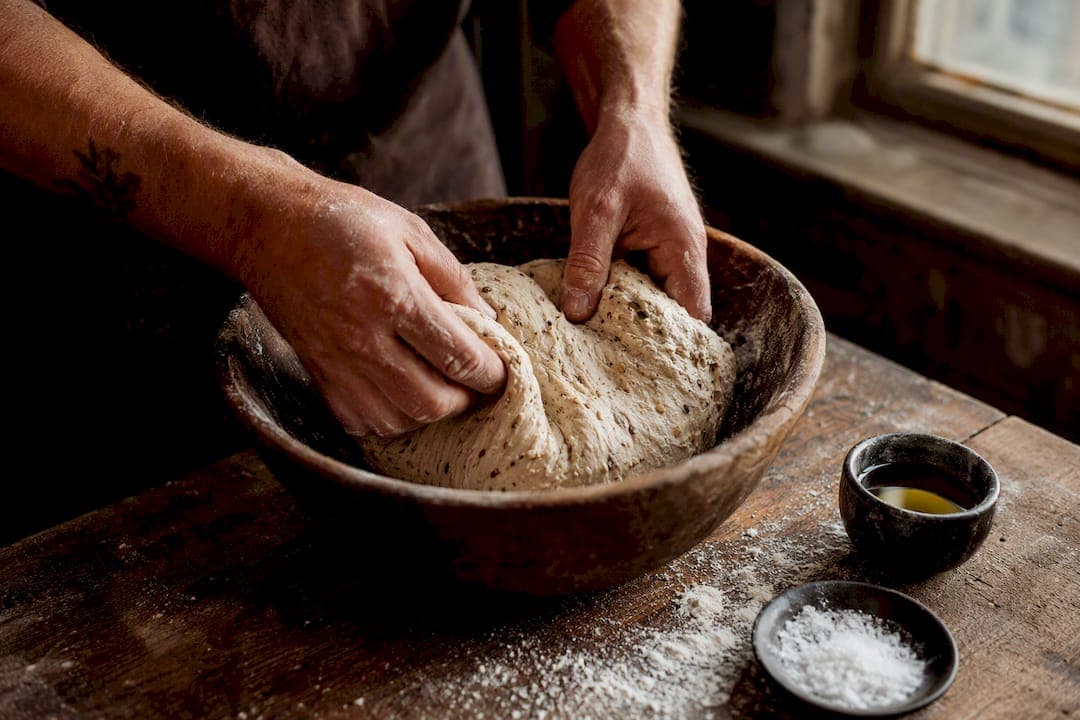
That range balances a tender, open crumb against dough you can actually shape without it sticking to everything it touches. The math itself is simple: divide water weight by flour weight, multiply by 100. A dough built from 600 g flour and 390 g water sits at 65% hydration, a figure many bakers treat as the reliable starting point for home ovens.
- Starting point: 60–70% hydration, weighed in grams, not cups
- Why it works: balances softness and structure in a typical home oven
- The formula: water weight ÷ flour weight × 100
Key Takeaways
| Point | Details |
|---|---|
| Start at 60–65% | This range gives beginners a manageable dough while they build shaping skill. |
| Weigh everything in grams | A digital scale accurate to 1 g keeps your hydration percentage honest. |
| Match style to hydration | Pan styles like Detroit can run 70–75% because the pan supports the structure. |
| Step up gradually | Raise hydration by 1–2% per batch and adjust yeast down as fermentation speeds up. |
| Use cold fermentation | A 24 to 72 hour fridge rest makes wetter dough far easier to shape. |
Table of Contents
- Pizza dough hydration explained: the baker's percentage
- Hydration ranges for every pizza style
- How hydration changes texture, fermentation, and handling
- Matching hydration to your oven, flour, and fermentation plan
- Fixing sticky dough without starting over
- What HellCrust has learned about wetter, whole-grain dough
- Why the hydration obsession misses the point for home bakers
- Sources
Pizza dough hydration explained: the baker's percentage
Hydration is simply the ratio of water to flour, expressed as a percentage, and it's the single most useful number in your entire recipe. Every serious dough formula is written this way because it scales cleanly, whether you're making one pizza or twenty.
- Weigh your flour first. Say it's 500 g.
- Weigh your water. At 65% hydration, that's 325 g.
- Divide 325 by 500, multiply by 100. You get 65%.
If you're using a preferment like a biga or a poolish, include its flour and water in your grand totals, not as a separate side calculation. Use a digital scale accurate to 1 g. Cups compress flour unpredictably, and a 20 g error on a small batch can shift your hydration by two or three full percentage points, which is enough to turn a workable dough into a puddle.
Hydration ranges for every pizza style
Different pizza styles are built around different water ratios, and matching the two is what separates dough that behaves from dough that fights you.
- Neapolitan: a typical range producing a soft, pliable disc with a puffy, leopard-spotted cornicione
- New York style: usually a moderately hydrated dough giving enough chew and foldability for a hand-held slice
- Detroit or Sicilian: 70–75%, since the pan holds the shape while the dough stays airy inside
- Roman al taglio: very high hydration dough with a batter-like consistency that works because it bakes in a tray
- Thin and crisp styles: lower hydration doughs producing a drier, crackery bite
Notice the pattern: pan styles push hydration higher because the pan does the structural work that your hands would otherwise have to do free form. A round pizza launched straight onto a stone or steel has no such support, so it needs a firmer dough to hold its shape during the stretch and the slide off the peel.
How hydration changes texture, fermentation, and handling
Water does more than make dough workable. It changes the crumb, the timeline, and how your hands need to move.
More water softens the gluten network, which lets trapped gas expand into bigger, more irregular air pockets rather than a tight, uniform crumb. Research on dough rheology confirms this directly: increasing water content lowers a dough's storage modulus and yield stress, which is a technical way of saying the dough gets softer and less resistant to stretching. That's exactly the mechanism behind the open, glassy crumb you see in a well-made Neapolitan crust.
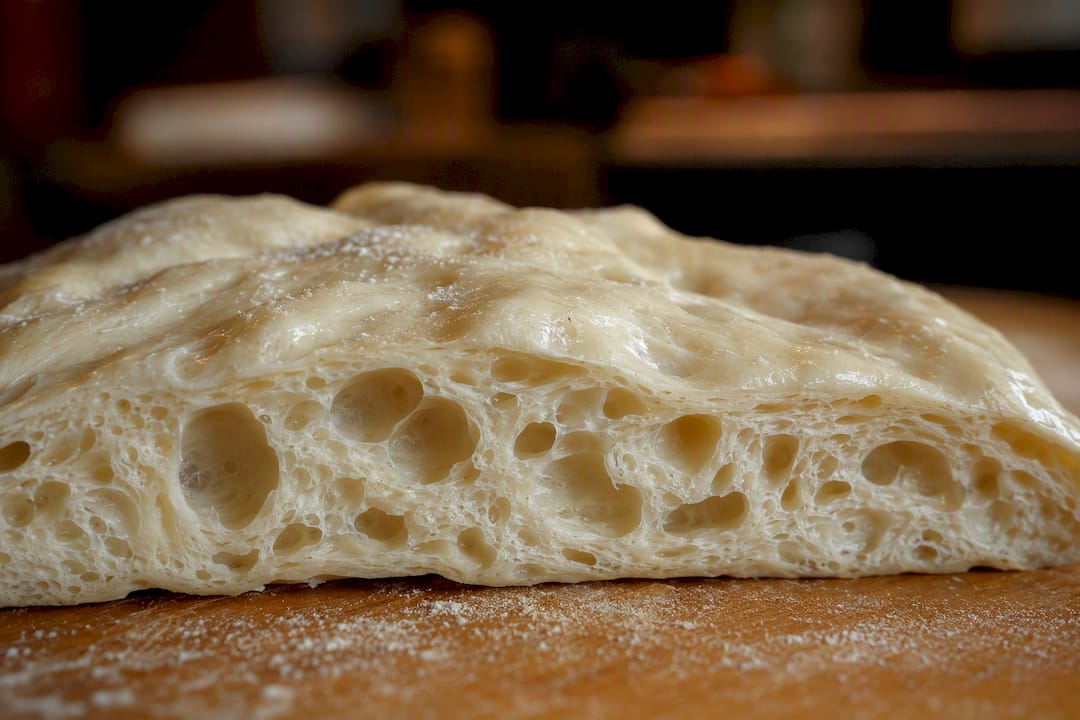
Water also speeds up fermentation. A wetter dough ferments faster than a stiffer one, because yeast and enzymes move more freely through a loose, well-hydrated network. If you push your hydration up without adjusting your timeline or yeast quantity, you'll likely find your dough overproofed before your oven's even hot.
It slows fermentation back down to a manageable pace, instead of racing past your bake time.*
- Higher hydration: stickier, more extensible, requires stretch-and-fold instead of aggressive kneading
- Lower hydration: firmer, easier to knead by hand, less prone to tearing during shaping
Matching hydration to your oven, flour, and fermentation plan
Your oven is the biggest hidden variable in this whole equation. Most home ovens top out around 250°C to 290°C, well below the 400°C-plus of a wood-fired setup, and that gap changes how much water your crust can carry before it turns gummy in the middle. A baking steel or stone raises the effective heat hitting the bottom of your dough, which lets you push hydration up a percent or two without ending up with a pale, underbaked centre.
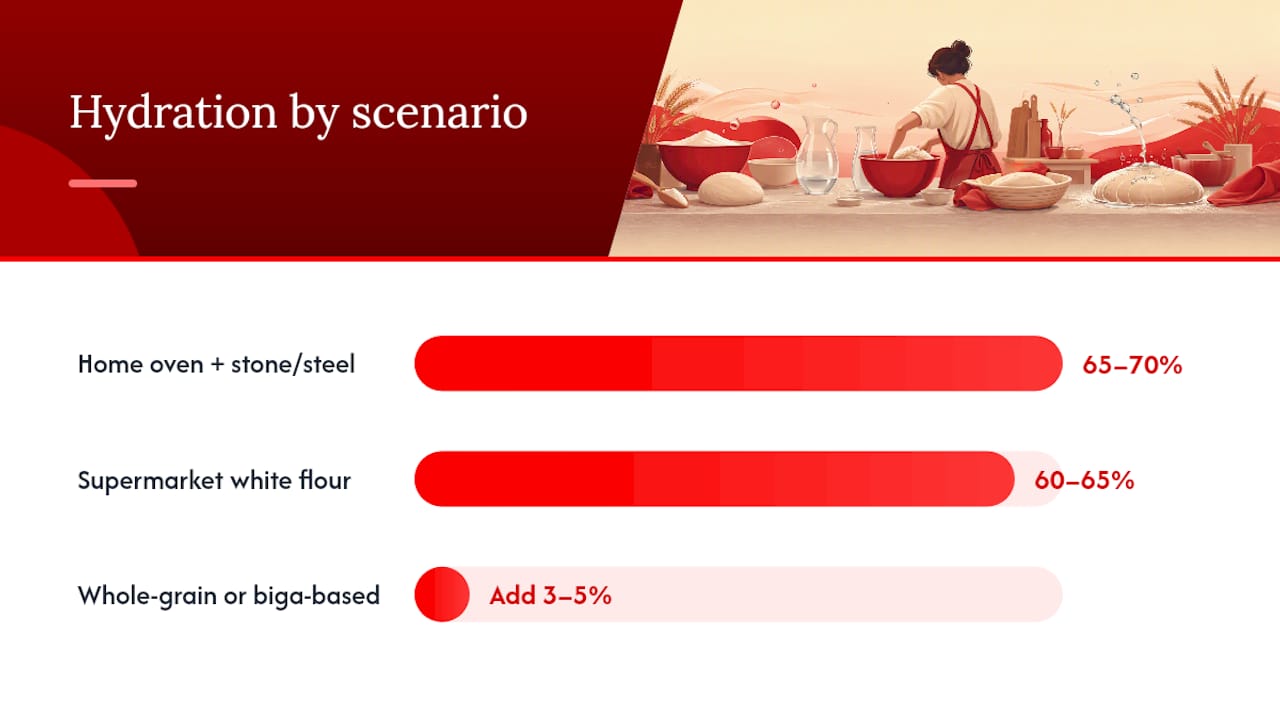
Flour matters just as much. Whole-grain and high-extraction flours sit apart from both: they typically need 3 to 5% more water than white flour just to hydrate fully, since bran and germ soak up moisture that white flour doesn't contain.
Cold fermentation ties the two together. A 24 to 72 hour rest in the fridge strengthens gluten and makes wet dough dramatically easier to shape, which is why experienced bakers pair 70% hydration with at least 24 to 48 hours cold rather than trying to shape it the same day.
- Standard home oven with a stone or steel: 65 to 70% is realistic
- Supermarket flour, no preferment: stay closer to 60 to 65%
- Whole-grain or biga-based dough: add 3 to 5% water over your usual number
Fixing sticky dough without starting over
Wet dough isn't broken dough. It just needs different handling, and a few small adjustments usually solve the problem entirely.
- Wet your hands before touching the dough instead of reaching for more flour, which changes your hydration without you realizing it.
- Use a bench scraper to lift and fold rather than pulling dough off the counter with your fingers.
- Dust your peel with semola or coarse cornmeal instead of flour. It acts like tiny ball bearings and slides far more reliably.
- Give the dough an extra stretch-and-fold and a 20 to 30 minute bench rest if it feels slack and won't hold tension.
- If a batch consistently fights you, drop water by 1 to 2% next time rather than jumping straight back to your old recipe.
If your oven simply can't produce enough top heat to set a high-hydration crust before the centre turns gummy, that's a legitimate reason to bake in a pan or accept a lower hydration rather than fighting your equipment.
What HellCrust has learned about wetter, whole-grain dough
Hellcrustpizza builds every pizza on a Biga multigrain dough, and multigrain doughs simply drink more water than a plain white flour dough ever will. The bran in whole-grain flour absorbs moisture that would otherwise stay free in the dough, which is part of why our recipes lean toward the higher end of the hydration range rather than the low end.
- Whole-grain and biga-based doughs typically need 3 to 5% more water than a standard white flour recipe
- A long, cold biga fermentation does the heavy lifting that would otherwise require aggressive kneading
- Author jaskirat Singh has written extensively on fermentation's role in dough performance, a theme that runs through much of Hellcrustpizza's approach to artisan dough
Why the hydration obsession misses the point for home bakers
That framing does real damage to beginners, who chase a number they read in a forum post instead of a dough that actually works in their oven with their flour.
The evidence points somewhere more useful: your oven's top heat and your flour's protein strength decide your ceiling long before ambition does.
What gets underrated constantly is cold fermentation as a handling tool, not just a flavour tool. A day or two in the fridge turns a wet, uncooperative dough into something genuinely shapeable, often more effectively than any amount of technique refinement. Readers should prioritize that lever before flour upgrades or exotic folding methods. Small, deliberate steps beat dramatic leaps every time a home baker tries to level up.
— jaskirat Singh
Sources
- Hydration for home pizza: Why 60–70% works best — Baking Steel
- Foods (PMC) — Effects of water and gelatinized starch on pizza dough rheology (2022)
- PizzaStunde — Pizza dough hydration explained