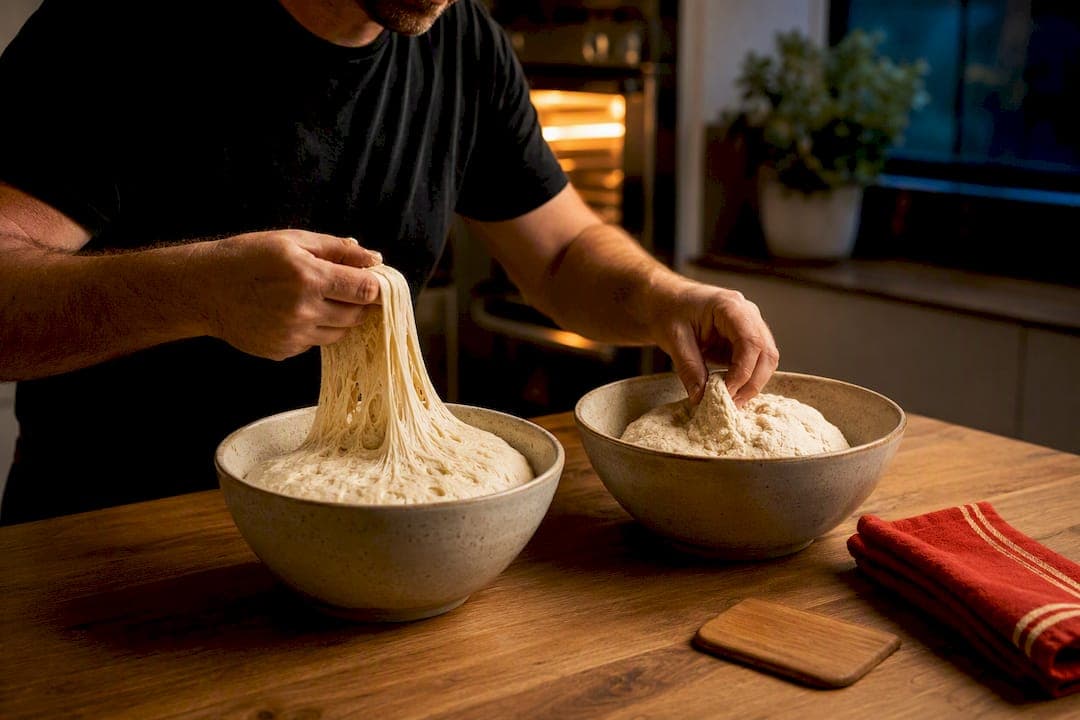
For most allergy households, a gluten-free yeast dough built with psyllium husk or xanthan gum gives you the closest texture to traditional crust, and it can be dairy, egg, nut, soy, and sesame-free when you choose certified ingredients. Save the no-yeast baking powder version for nights when dinner needs to happen in under 30 minutes. Both methods hinge on one non-negotiable step: par-baking the crust before you top it, which keeps the centre from turning gummy.
TL;DR:
- Par-baking the crust for 10 to 15 minutes at high heat is essential to prevent sogginess in gluten-free allergy-friendly pizza.
- Using a blend of whole-grain gluten-free flours, tropical starches, and natural binders like psyllium husk or xanthan gum achieves a texture similar to traditional crust.
- The no-yeast quick dough offers a fast alternative that can go from mixing to oven in under 30 minutes, though it sacrifices some flavor and chew.
- Proper handling involves pressing the dough on oiled parchment rather than kneading or rolling, avoiding excess flour to maintain proper texture.
- For complex allergy needs or time constraints, ordering from dedicated allergen-safe pizza providers can be a practical and safe solution.
Table of Contents
- Two allergy-friendly pizza dough recipes worth keeping on hand
- Which flours, starches and binders actually work?
- How do you handle and bake gluten-free dough properly?
- Why did my gluten-free pizza crust turn out wrong?
- Can you freeze allergy-friendly pizza dough?
- What toppings and substitutions work for multi-allergen households?
- When does ordering beat baking from scratch?
- What this guide gets right that most others miss
- Order a ready-made, additive-free crust when time is short
- Sources
- FAQ
Two allergy-friendly pizza dough recipes worth keeping on hand
Every allergy-safe pizza dough recipe eventually splits into two camps: the ones that use yeast for that slow, developed flavour, and the ones that skip it entirely for speed. We tested both. Here's what actually works.
Recipe A: Gluten-free yeast dough (best texture)
This one behaves the most like a "real" crust, with a little chew at the edge and enough structure to hold toppings without folding in half.
Ingredients (makes one 12-inch crust):
- 280 g (2¼ cups) whole-grain gluten-free flour blend (brown rice, millet, or sorghum base)
- 60 g (½ cup) tapioca starch
- 2 tsp instant yeast
- 1½ tsp psyllium husk powder or 1 tsp xanthan gum
- 1 tsp fine salt
- 1 tsp sugar (feeds the yeast)
- 300 ml (1¼ cups) warm water (about 43°C / 110°F)
- 2 Tbsp olive oil, plus extra for shaping
Method:
- Whisk the dry ingredients together first, distributing the psyllium or xanthan evenly so you don't get gummy pockets.
- Add warm water and olive oil, then mix until you get a thick, slightly sticky batter rather than a kneadable ball. This is normal for a gluten-free pizza dough.
- Cover and let it proof for 45 to 60 minutes in a warm spot until visibly puffed.
- Oil a sheet of parchment, grease your hands, and press the dough into a 12-inch round directly on the parchment.
- Par-bake at 220°C (425°F) for 10 to 12 minutes before adding any toppings.
- Top and return to the oven for another 8 to 10 minutes, until the edges are golden.
Recipe B: No-yeast quick dough (fastest option)
This is the one to reach for on a Tuesday when the kids are hungry and nobody has 90 minutes to spare.
Ingredients (makes one 12-inch crust):
- 250 g (2 cups) whole-grain gluten-free flour blend
- 40 g (⅓ cup) tapioca or potato starch
- 2 tsp baking powder
- 1 tsp psyllium husk powder
- ½ tsp salt
- 1 tsp apple cider vinegar
- 220 ml (¾ cup plus 2 Tbsp) water or dairy-free milk
- 2 Tbsp olive oil
Method:
- Combine dry ingredients, then stir in the vinegar, liquid, and oil until a soft, workable dough forms.
- Rest for 5 minutes. The psyllium needs that short window to gel and give the dough some spring.
- Press directly onto oiled parchment with greased hands, since this dough is too sticky to roll cleanly.
- Par-bake at 230°C (450°F) for 8 to 10 minutes.
- Add toppings and bake another 7 to 9 minutes until set.
A yeast-free base can go from mixing bowl to oven in under 30 minutes, which makes it the practical choice for weeknights, even though the yeasted version wins on flavour and chew.
Which flours, starches and binders actually work?
The right blend depends on what you're avoiding and what texture you're chasing, but a few ingredients do most of the heavy lifting across nearly every allergy-friendly recipe.
Whole-grain gluten-free flours — brown rice, millet, and sorghum — give the crust body and a slightly nutty flavour that plain starch alone can't provide. Relying on starch by itself produces a crust that's gummy and flavourless, which is why blends work better than single ingredients.
Starches fill in the texture gaps:
- Tapioca starch adds chew and a bit of stretch.
- Potato starch lightens the crumb and helps browning.
- Arrowroot starch works similarly to tapioca and suits people avoiding corn-derived starches.
Combining two or three of these starches gets you a texture closer to traditional wheat crust than any single starch manages on its own.
Binders are where most home bakers go wrong. Xanthan gum is the easier starting point for beginners because it's forgiving and works in almost any ratio. Psyllium husk is the better choice for hand-shaped crusts because it forms a flexible gel that gives the dough actual spring and stretch, closer to what gluten would normally provide. The trade-off: psyllium can affect digestion for some people in larger amounts, so start with 1 to 1½ teaspoons per crust and adjust from there.
Statistic Callout: A 17-ounce bag of a certified free-from mix like gfJules pizza crust mix yields two to three 12-inch crusts and is formulated without any of the top nine allergens, making it one of the more practical shortcuts for multi-allergen households short on prep time.
A small splash of apple cider vinegar does something most recipes skip entirely: it tightens the protein matrix in rice-based blends, which improves rise and texture in yeast-free doughs especially. If you're building your own artisan-style flour blend, that acid addition is worth testing before you assume your starch ratio is the problem.
One label note that matters more than any ratio: check that your flour blend and starches are certified gluten-free and produced on lines without wheat starch. Cross-contact during manufacturing is a risk no recipe can fix after the fact.
How do you handle and bake gluten-free dough properly?
Gluten-free dough feels nothing like wheat dough, and trying to knead or stretch it the way you'd handle a traditional ball will only frustrate you. It should be thick, slightly sticky, and closer to a stiff batter than a smooth dough ball. That stickiness is normal, not a sign you've done something wrong.
Pro Tip: Skip the rolling pin entirely for your first few attempts. Gluten-free dough is better handled by pressing rather than stretching, and oiled hands on oiled parchment give you far more control than a rolling pin ever will.
- Oil a sheet of parchment paper generously, then grease your hands with olive oil before touching the dough.
- Press from the centre outward in small increments, rotating the parchment as you go, rather than trying to stretch the edges thin the way you would with a wheat crust.
- Slide the parchment (with the dough still on it) directly onto a preheated pizza stone or the underside of a rimmed baking tray.
- Par-bake at 220 to 230°C (425 to 450°F) for 10 to 15 minutes before adding any toppings.
- Add sauce and toppings, then finish baking for another 8 to 10 minutes until the edges are golden and firm.
A pizza stone gives you a crisper bottom because it holds heat better than a metal tray, but a rimmed tray works fine if you preheat it in the oven for at least 10 minutes first. Either way, the par-bake step is the one most home bakers skip, and it's the single biggest reason gluten-free crusts turn soggy in the middle. Setting the starches before toppings go on gives the centre a fighting chance against wet sauce and vegetables.
Why did my gluten-free pizza crust turn out wrong?
Most allergy-friendly dough failures trace back to one of four problems, and each has a specific fix rather than a guess-and-check solution.
- Crumbly crust: Add another ½ teaspoon of psyllium or xanthan, and let the dough rest 10 minutes longer before shaping so the binder has time to fully hydrate.
- Gummy or dense centre: Cut your starch by about 20% and increase the whole-grain flour proportion, then check your oven with a thermometer, since many home ovens run cooler than their dial suggests.
- Soggy middle after topping: Extend the par-bake by 3 to 5 minutes, or move your rack closer to a preheated stone for stronger bottom heat.
- Tough or leathery crust: Pull it from the oven a minute or two earlier next time, and resist dusting extra flour onto the dough while shaping, since excess flour dries out the final texture.
- Flat crust with no rise: Confirm your yeast is still active (proof it in warm water with sugar first) or, for the no-yeast version, check that your baking powder isn't expired.
None of these fixes require starting over. Adjust one variable, rebake, and you'll usually land on a repeatable result within two attempts.
Can you freeze allergy-friendly pizza dough?
Both raw dough and par-baked crusts store well, which makes batch-prepping on a weekend a genuinely useful habit for busy households.
- Refrigerate raw dough in an airtight container for up to 2 days. Use a dedicated container, not one that's touched wheat products, to avoid cross-contact.
- Freeze raw dough as a flattened disc wrapped in parchment and a freezer bag for up to 2 months. Thaw overnight in the fridge before shaping.
- Freeze par-baked crusts flat, separated by parchment, for up to 3 months. This is the better option if you want dinner ready in 15 minutes flat.
- Reheat directly from frozen at 220°C (425°F) for 10 to 12 minutes, adding toppings once the crust is warm enough to hold them without steaming.
Reheating on a preheated stone or tray restores crispness far better than a microwave ever will, which just turns the crust soft.
What toppings and substitutions work for multi-allergen households?
Most pizza dough recipes assume egg and dairy are optional extras. For allergy households, they're the whole reason you're reading this. None of the recipes above call for egg, but if you're adapting a different base that does, a flax egg (1 tablespoon ground flax plus 3 tablespoons water) or 3 tablespoons of aquafaba works as a binder substitute, or you can often omit it entirely in a starch-heavy dough.
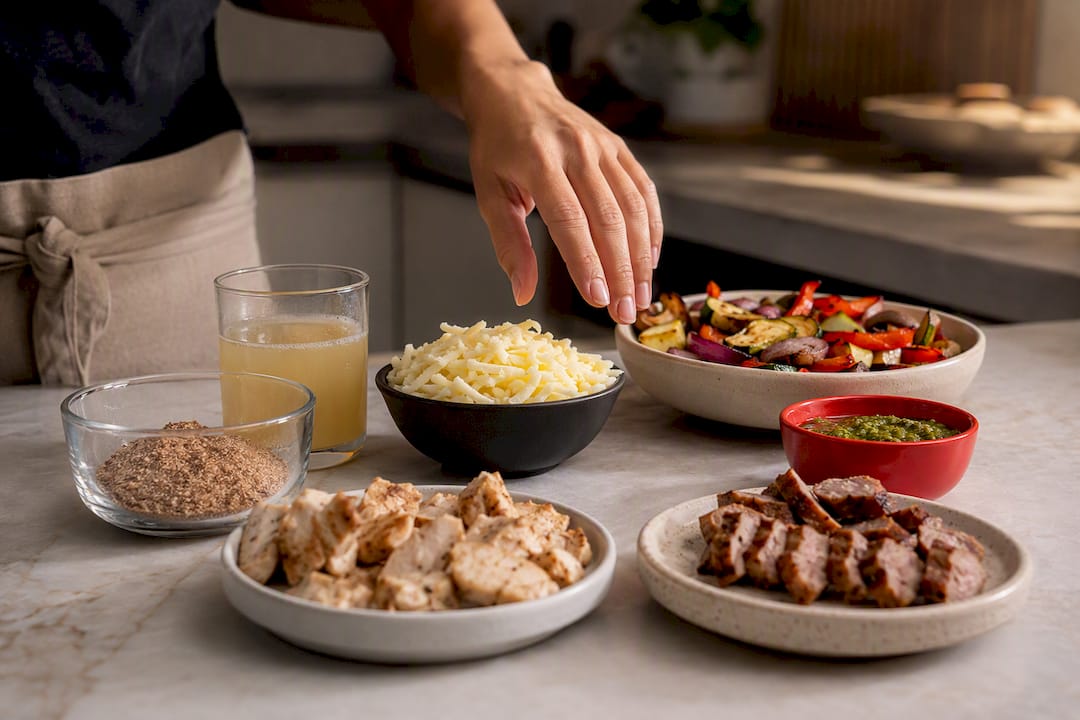
For cheese, look at oil-based or starch-based non-dairy melts rather than the nut-based varieties, which solve a dairy problem while introducing a nut one. Roasted vegetables, dairy-free pesto, and simple proteins like grilled chicken or plant-based sausage cover most topping needs without touching nuts, soy, or shellfish.
Always check jarred sauces and pre-shredded toppings for hidden soy lecithin or sesame oil. For a deeper look at safe topping combinations for allergy-aware families, it's worth reading before your next grocery run, and the Kids With Food Allergies recipe library is another solid reference for base recipes built around the same constraints.
When does ordering beat baking from scratch?
Some nights, the safest crust is the one you didn't have to build yourself. Some pizza services bake with a Biga multigrain, artificial additive-free dough, and offer vegan and gluten-free options alongside customizable toppings, which matters when a household is managing more than one allergy at once and can't afford a mixing mistake.
A slow-fermented Biga isn't just a technique we're proud of. It's a promise that what goes into the dough is exactly what you can see and pronounce, nothing hidden, nothing added to cut corners.
Ordering makes the most sense on the nights when time is short, when you're feeding a group with mixed allergy needs, or when the stakes of a cross-contact mistake are simply too high to risk a home experiment. It won't replace the satisfaction of pulling your own crust out of the oven, but it's a dependable option for the nights that call for one.
What this guide gets right that most others miss
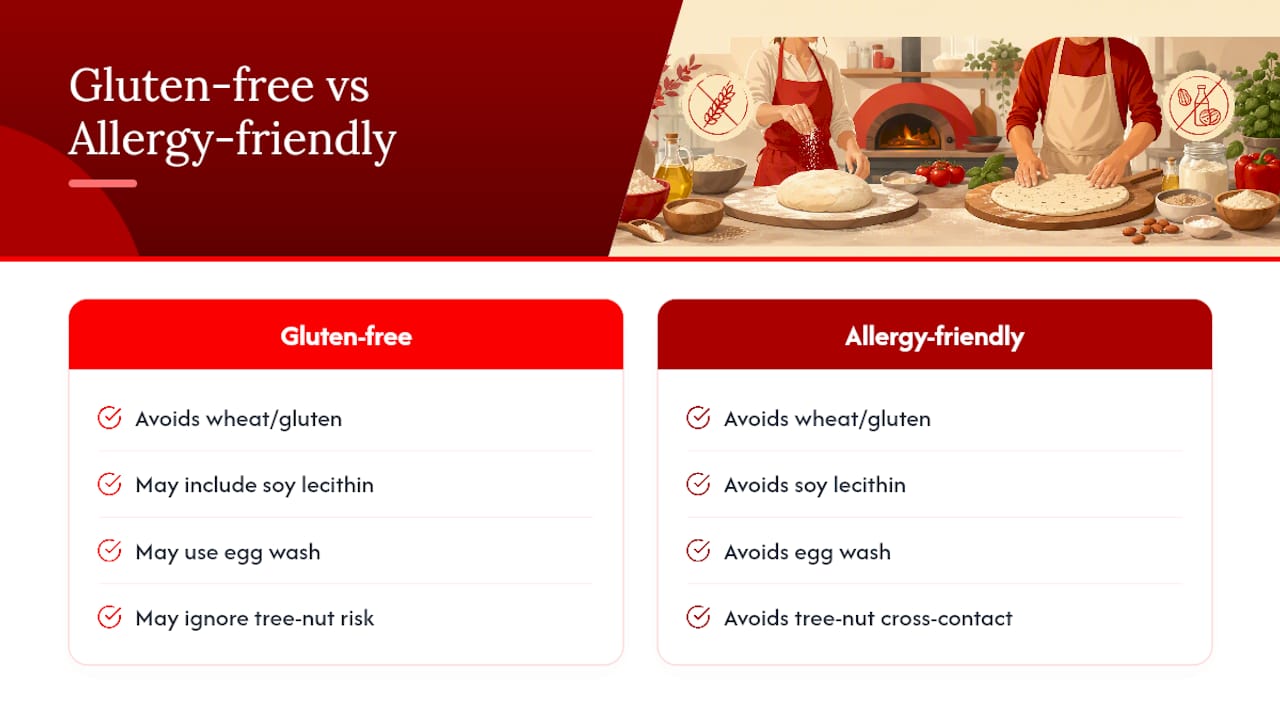
The advice floating around most food blogs treats gluten-free and allergy-friendly as the same problem. They're not. A crust that's gluten-free but loaded with soy lecithin, egg wash, or a shared factory line with tree nuts solves nothing for a household managing four or five allergens at once. The real work is in the blend and the sourcing, not just swapping wheat flour for rice flour and calling it done.
Most recipes also underplay the par-bake step, treating it as optional polish rather than the fix for the single most common complaint: a soggy, undercooked centre. If you take one thing from this guide, take that step. It costs ten minutes and solves a problem that sends most home bakers back to store-bought crusts out of frustration.
And if a night comes when scratch baking isn't realistic, that's not a failure. It's a reasonable trade-off, and one worth having a backup for.
— jaskirat Singh
Order a ready-made, additive-free crust when time is short
Hellcrustpizza gives you a shortcut without the shortcuts that usually come with convenience food: the Biga multigrain, artificial additive-free dough is built the same way whether you're ordering for one or feeding a family, and vegan and gluten-free options are available alongside fully customizable toppings.

Baking from scratch is worth it when you have the time and want full control over every ingredient that touches the dough. But on nights when a severe allergy leaves no margin for a kitchen mistake, or when you're feeding a crowd for a birthday or a team event, ordering removes the guesswork entirely. Some pizza services offer Mix & Match deals and family-sized specials to help feed mixed-allergy households without cooking two separate meals. Head to Hellcrustpizza to check toppings and place an order for tonight.
Sources
- Gluten-free pizza crust recipe | King Arthur Baking
- No-yeast pizza dough (Happy Hooligans)
- Gluten free pizza crust | Allergy Awesomeness
- gfJules gluten free pizza crust mix | Gluten Free Journey (Canada)
FAQ
How do you make anti-inflammatory pizza dough?
Build the crust around whole-grain gluten-free flours like sorghum or millet instead of refined starch alone, and use olive oil rather than seed oils. Whole grains and healthy fats are generally considered better choices for reducing inflammatory triggers than a starch-only base.
What's a good alternative to traditional pizza dough?
A gluten-free yeast dough made with tapioca starch and psyllium husk is the closest alternative in texture and chew, while a no-yeast baking powder dough works when you need something on the table fast. Ordering a multigrain, additive-free crust from Hellcrustpizza is a reasonable option when scratch baking isn't practical.
Does gluten-free pizza crust contain egg?
Not necessarily. Most gluten-free crust recipes, including both versions in this guide, rely on starches and binders like psyllium or xanthan instead of egg, but always check store-bought crusts individually since formulas vary by brand.
Is pizza safe for people with egg allergies?
Pizza can be entirely safe for egg allergies as long as the dough recipe and sauce don't include egg wash, egg-based binders, or hidden egg derivatives in pre-made ingredients. Homemade dough gives you full control over that, which is exactly why a recipe-first approach matters for multi-allergen households.