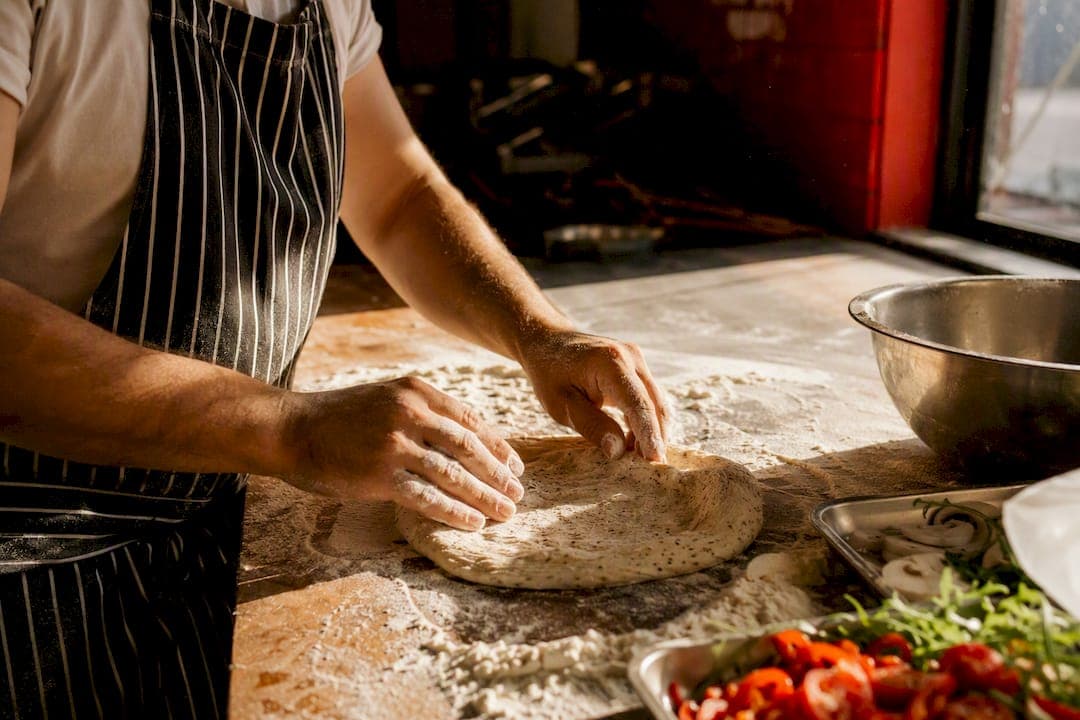
The quickest way to a reliably extra crispy pizza is a very hot, long preheated baking surface (a steel is our top pick), a hydration appropriate dough, and a short broil finish. That combination does more heavy lifting than any single trick, topping choice, or fancy gadget you'll find online.
Here's the honest breakdown of what actually moves the needle:
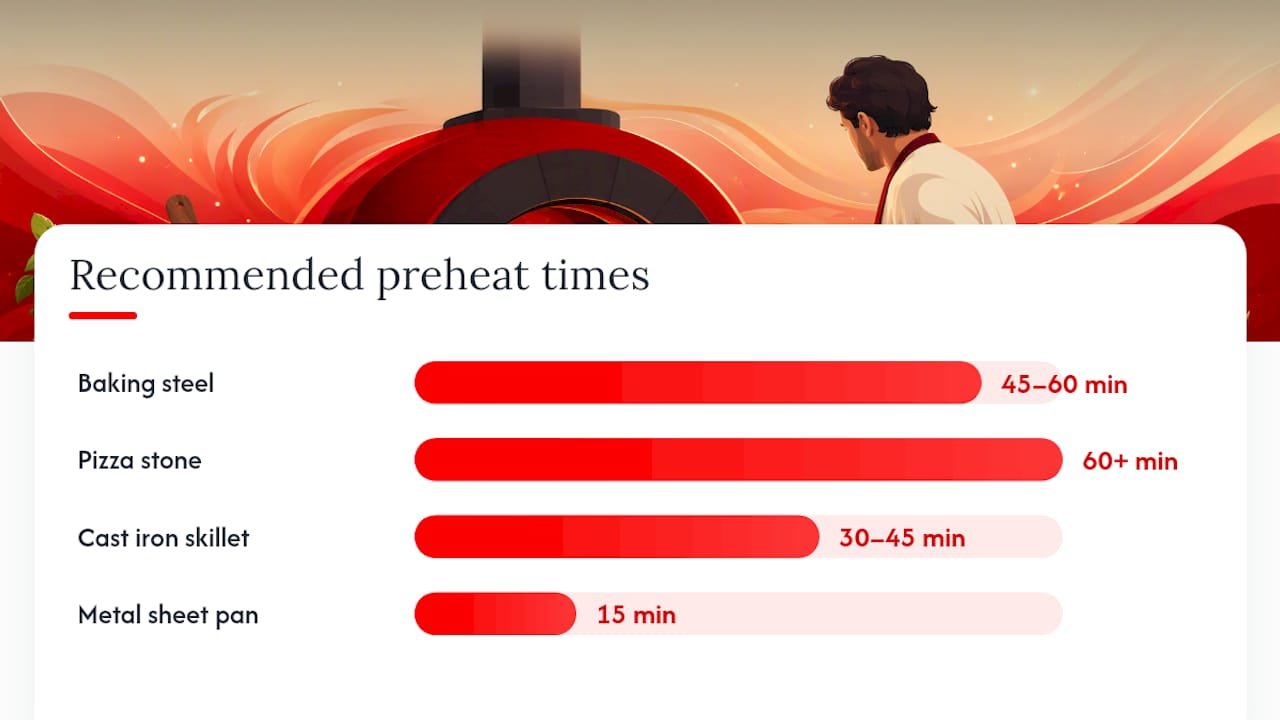
- Biggest single upgrade: a baking steel, preheated 45 to 60 minutes at your oven's maximum setting
- No steel? Use a stone, but preheat it for a full hour, since stone conducts heat more slowly
- In a real hurry? Preheat a metal half sheet pan for 15 minutes, then finish the bottom in a dry cast iron skillet on the stovetop for about 2 minutes
- Time to results: roughly 7 to 9 minutes of bake time once your surface is properly heated
Everything below explains why these steps work, how your dough's hydration changes the outcome, and what to do when your crust comes out pale, soggy, or scorched at the edges.
Key Takeaways
Extra crispy pizza depends on a properly preheated high mass surface, dough hydration matched to your skill level, and a short broiler finish to lock in browning.
| Point | Details |
|---|---|
| Preheat longer than feels necessary | Steel needs 45 to 60 minutes and stone needs 60 or more before the surface is truly ready. |
| Match hydration to your comfort level | Aim for a mid hydration range for balance between crispness and ease of handling. |
| Use the broiler as your finishing move | A 60 to 90 second broil at the end locks in browning that the main bake alone can't achieve. |
| Rest on a rack, not a plate | Steam trapped under the crust on a flat surface undoes crispness within minutes. |
| Keep a fast fallback ready | A preheated sheet pan plus a 2 minute cast iron finish, as tested by Simply Recipes, rescues a soft bottom without special equipment. |
| Fermentation and dough quality still matter | HellCrust Pizza's Biga multigrain, additive free dough applies the same cold fermentation and hydration principles this guide recommends. |
Table of Contents
- How to make an extra crispy pizza: the quick recipe
- Which tools and ingredients matter most for crispiness?
- What hydration level gives the crispiest pizza dough?
- How hot should your oven and baking surface be?
- The step-by-step bake: load, watch, finish, rest
- Quick fixes to rescue or protect a crispy crust
- Why is my pizza soggy, pale, or burnt?
- How HellCrust Pizza's own dough practices back up this method
- What the conventional pizza advice gets wrong
- Get extra crispy pizza delivered without any of the oven work
- Frequently asked questions about extra crispy pizza
- Sources
How to make an extra crispy pizza: the quick recipe
This recipe makes one 12 inch pizza with a crackly, well done bottom and a crust that holds its shape when you pick up a slice. We built it around a hydration level suitable for balancing workability and crispness, which sits in the sweet spot between a dough that's easy to shape and one that still crisps aggressively in the oven.
Ingredients (one 12 inch pizza):
- 250g bread flour (11 to 13% protein works best for structure)
- 158g water, room temperature (this is your 63% hydration)
- 5g fine sea salt
- 2g instant yeast (or 1g if proofing overnight in the fridge)
- 6g olive oil, plus extra for the pan or peel
- Optional: a pinch of diastatic malt powder for extra browning
Mixing and timing:
Combine flour and water first and let it rest for 20 minutes before adding salt and yeast. This short autolyse relaxes the gluten and makes the dough noticeably easier to stretch later. Knead by hand or mixer for about 8 minutes until smooth, then let it bulk ferment at room temperature for 2 hours.
For same-day pizza, shape the dough after bulk fermentation and let it rest another 45-minute before stretching. For better flavour, move the dough to the fridge after shaping into a ball and let it cold retard for 24 to 48 hours, then pull it out an hour before you plan to bake.
Baking:
Preheat your oven to its maximum setting (usually 500 to 550°F) with a steel in the middle or upper third rack for 45 to 60 minutes. Stretch your dough onto a lightly floured peel or a sheet of parchment, top it, and slide it onto the hot steel. Bake 6 to 8 minutes, watching for dark leopard spotting on the crust edges, then switch to broil for 60 to 90 seconds to finish the top.
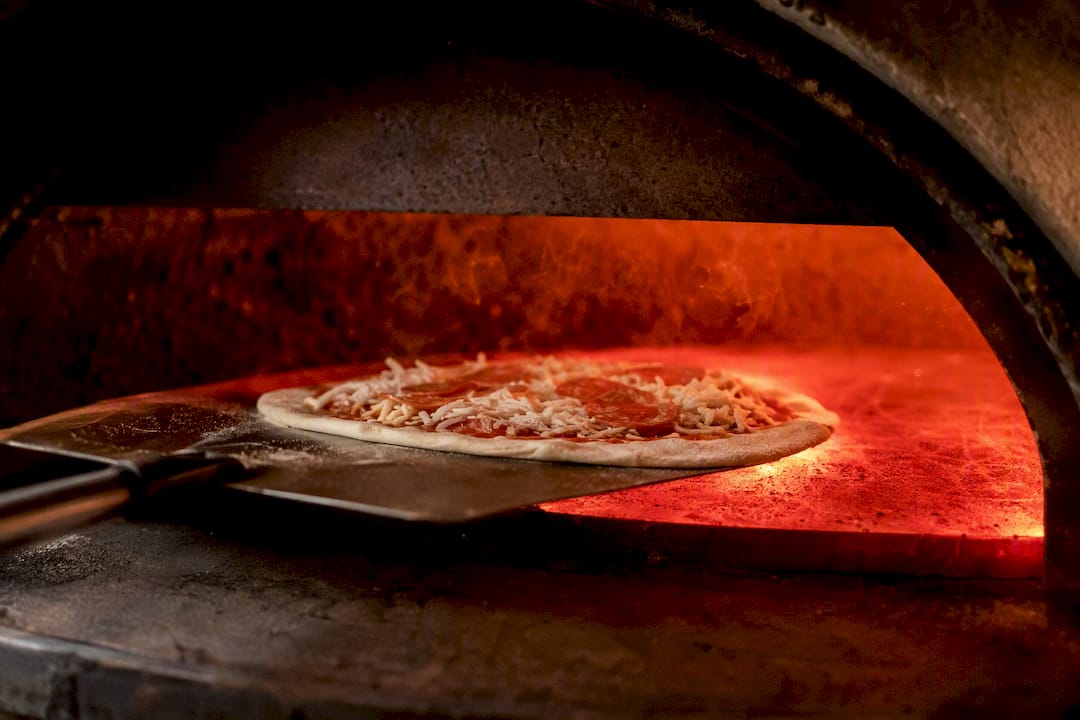
Statistic worth remembering: a baking steel pushes the dough's underside through the browning threshold in 30 to 45 seconds, where a stone can take up to two minutes to do the same job. That gap is the entire reason steel produces a more aggressively crisped bottom.
If you only have a sheet pan: preheat it empty for 15 minutes, bake the pizza on it as normal, then transfer the finished pizza (or just the bottom) to a dry, hot cast iron skillet on the stovetop for 2 minutes to lock in crispness before slicing.
Which tools and ingredients matter most for crispiness?
Not every gadget earns its shelf space. A few choices genuinely change your outcome, and the rest is marketing.
- Baking steel: the best all-around choice for home ovens. It stores more thermal energy than stone and transfers heat faster on contact.
- Pizza stone: works well, especially for thinner, more delicate crusts, but needs a longer preheat and recovers more slowly between bakes.
- Cast iron skillet: excellent as a stovetop rescue tool or for small personal pizzas baked start to finish in the pan.
- Half sheet pan: the weakest option for raw crispness, but the fastest to preheat and perfectly serviceable with a cast iron finish.
- Infrared thermometer: the only reliable way to confirm your surface has actually reached the target temperature, rather than guessing from your oven's dial.
- Wooden or metal peel: makes loading and unloading far less stressful, especially with a wetter dough that wants to stick.
Ingredients matter too. Low-moisture, part-skim mozzarella releases far less water into the crust than fresh mozzarella. A splash of olive oil in the dough and a light coat on the baking surface both help the crust fry slightly as it bakes, which is part of what gives a well done pizza that shatter-crisp bite. A pinch of diastatic malt powder adds fermentable sugar that boosts browning without adding sweetness.
Pro Tip: Buy an infrared thermometer before you buy a second baking stone. Most soggy or pale crusts trace back to an oven that never actually reached the surface temperature the recipe assumed.
What hydration level gives the crispiest pizza dough?
Hydration is the single biggest lever you have over texture, and it's worth understanding before you touch flour and water. Hydration largely determines the finished texture of your crust: around 70% hydration baked at high heat produces a crisp exterior with a tender, almost custardy interior, while 60 to 65% is easier to handle and gives you a foldable crust with a crisp outer shell.
Here's how the ranges break down in practice:
- 55 to 60% hydration: firmer, cracker-like crust. Easiest dough to work with, but less airy inside.
- 60 to 65% hydration: the classic crispy crust pizza dough range. Foldable, crisp on the outside, workable for beginners.
- 65 to 70% hydration: airier crumb with a crisp shell, closer to a Neapolitan style bite, but stickier to shape.
- Above 70%: genuinely difficult to handle without practice, prone to tearing, and not worth the trouble for most home setups.
For your first few attempts at extra crunchy pizza dough, stay in the 60 to 65% range. It rewards you with crispness without punishing you for being new to high hydration handling.
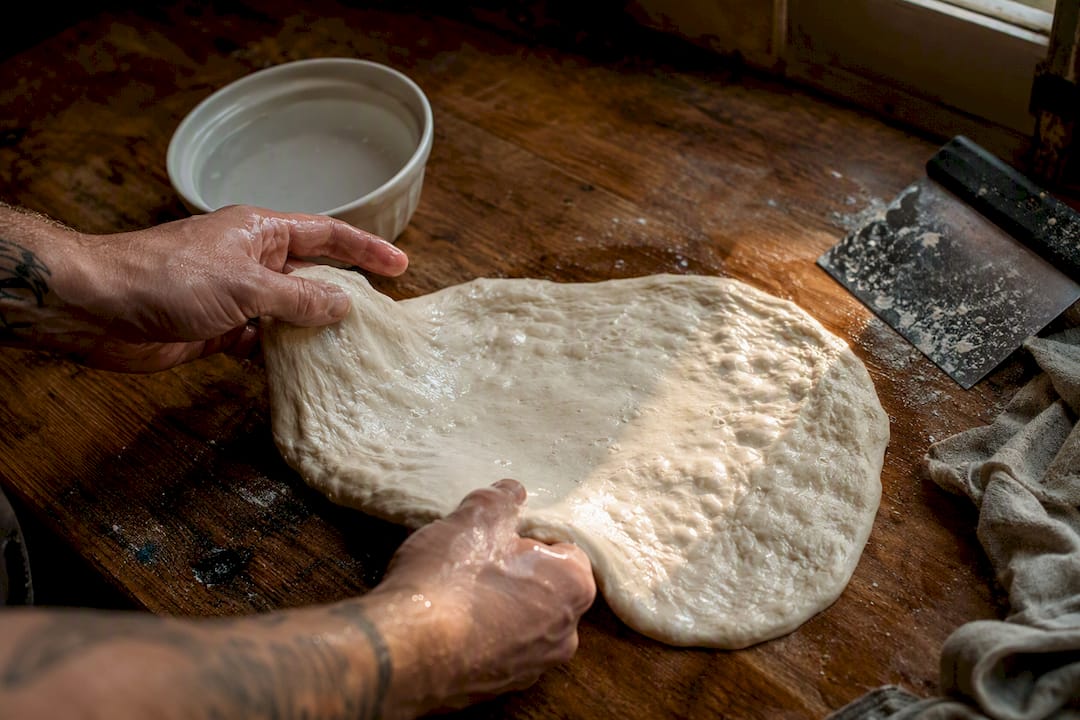
Handling higher hydration dough: a short autolyse (mixing just flour and water and letting it sit 20 to 30 minutes before adding salt and yeast) makes wetter dough dramatically easier to work with. Keep a small bowl of water nearby and wet your hands instead of flouring the counter heavily, since extra flour worked into a high hydration dough during shaping can actually toughen the crumb. Use bench flour sparingly, just enough to keep the dough from sticking as you stretch it.
Fermentation and crispness: longer, cold fermentation develops more complex flavour and a slightly more open crumb, which in turn crisps more evenly because gas pockets create thinner, more browning-prone walls in the dough. Same-day dough still crisps well, especially with a hot enough surface, but a 24 to 48 hour cold retard in the fridge gives you a noticeably better crust with very little extra effort. If you want to go deeper on how different artisan pizza dough types handle fermentation and hydration differently, that's a useful next read.
A number to keep in mind: at 70% hydration and high oven heat, you get a crisp exterior with a tender interior, but that same dough is genuinely harder to stretch without tearing than a 63% dough. Choose your hydration based on your patience level, not just your ambition.
How hot should your oven and baking surface be?
Preheat time is where most home cooks quietly sabotage their own pizza. Cranking the oven to maximum for 10 minutes and calling it "preheated" leaves the surface itself far cooler than the air around it, and it's the surface, not the air, that crisps your crust.
| Baking surface | Preheat time | Rack position | Notes |
|---|---|---|---|
| Baking steel | 45 to 60 minutes | Upper third for thin crust, lower third for thicker pies | Fastest browning, recovers between bakes in 2 to 4 minutes |
| Pizza stone | 60 minutes or more | Middle to lower third | Slower to heat and to recover, roughly 4 to 7 minutes between bakes |
| Cast iron skillet | 30 to 45 minutes | On the stovetop or in-oven | Best for stovetop finishing or small personal pizzas |
| Metal sheet pan | 15 minutes | Middle rack | Fast but weakest crisping; pair with a cast iron finish |
An infrared thermometer takes the guesswork out entirely. Aim for a surface reading of roughly 500°F before you launch your first pizza, a target confirmed by King Arthur Baking's testing on steel versus stone performance. Rack position matters almost as much as preheat time: thin, cracker-style crusts crisp best closer to the top heat source, while thicker, doughier crusts need more time near the bottom element to cook through before the top burns.
If you're baking more than one pizza, don't skip recovery time. Steel surfaces need 2 to 4 minutes to reheat between pies, while stone needs 4 to 7. Skip that recovery window and your second pizza will come out visibly paler than your first, no matter how good your dough is.
Pro Tip: Set a timer the moment you pull one pizza off the steel and don't load the next one until it goes off. The temptation to rush the second pie is exactly what produces the "why is my second pizza always worse" problem.
The step-by-step bake: load, watch, finish, rest
Getting the surface hot enough is only half the job. What happens in the next ten minutes determines whether you end up with genuinely extra crispy pizza or just a warm one.
-
Prep your peel or parchment. Dust a wooden peel generously with flour or semolina, or build your pizza directly on a sheet of parchment paper if your dough is on the stickier, higher hydration side. Parchment is more forgiving for beginners, but it insulates the bottom slightly, so plan to slide it out from under the pizza about halfway through the bake for maximum crisping.
-
Launch with confidence. Give the peel a firm, quick shake rather than a slow drag. Hesitation is what causes toppings to slide or dough to fold on itself mid-launch.
-
Watch the crust, not the clock. Leopard spotting (dark, blistered char spots on the crust rim) is your best visual signal that the surface temperature is doing its job. You should also see the cheese bubbling actively and the sauce starting to reduce slightly at the edges.
-
Check the underside before you trust the top. Around the halfway mark, use your peel to lift one edge and peek underneath. A well done pizza bottom should be deep golden brown with dark spots, not pale or floury looking.
-
Finish under the broiler. Once the crust and cheese look close but the top hasn't quite caught up, switch your oven to broil for 60 to 90 seconds. Watch closely here. Broilers are unforgiving, and the gap between "perfectly charred" and "burnt" can be under 20 seconds.
-
Rest before you slice. Pull the pizza onto a wire cooling rack, not a cutting board, for 2 to 3 minutes. A solid surface traps steam underneath the crust and softens exactly the crispness you just spent 45 minutes of preheating to build.
-
Slice with a rocking motion, not a saw. A pizza wheel or sharp chef's knife rocked through the crust keeps the structure intact, while sawing back and forth tends to compress and toughen the edge you worked so hard to crisp.
Pro Tip: If your parchment paper starts smoking under high heat, that's normal at temperatures above 450°F. Just make sure to slide it out from under the pizza by the halfway point so the bottom gets direct contact with the hot surface for the back half of the bake.
Quick fixes to rescue or protect a crispy crust
Sometimes the dough and oven setup are right, but the toppings or timing work against you. A few small moves protect the crispness you've already built.
- Soggy bottom rescue: transfer the finished pizza to a dry, preheated cast iron skillet on the stovetop over medium heat for about 2 minutes. This restores crispness fast without drying out the toppings.
- Very wet toppings (fresh tomato, mushrooms, thin-cut vegetables): parbake the crust alone until it's just pale and set, then add toppings and finish baking. This keeps raw vegetable moisture from soaking straight into the dough.
- Squeeze or salt-and-drain watery vegetables like mushrooms and zucchini for 15 minutes before topping, then pat them dry.
- Swap fresh mozzarella for low-moisture mozzarella whenever crispness matters more than that classic milky pull.
- Build an oil barrier by brushing a thin layer of olive oil on the crust before saucing, which slows sauce moisture from soaking into the dough while it bakes.
If you're experimenting with different crust and topping combinations, moisture control is the one variable that decides whether a creative topping choice helps or sabotages your crust.
Why is my pizza soggy, pale, or burnt?
Most crispness failures trace back to one of five repeat offenders. Here's the fast diagnosis.
- Soggy centre: usually too much sauce, wet toppings, or an underbaked crust. Reduce sauce quantity, drain wet vegetables, and confirm your surface actually hit target temperature with an infrared thermometer.
- Pale bottom: almost always an underheated surface. Extend your preheat, particularly with stone, and double check rack position puts the surface close enough to the heat source.
- Burnt edges with a pale centre: oven running hotter at the edges than the middle, or dough stretched unevenly thin at the rim. Rotate the pizza once during baking and stretch dough more evenly before topping.
- Crust that's crisp on removal but soft five minutes later: resting on a cutting board or plate instead of a wire rack traps steam underneath.
- Uneven leopard spotting: normal in home ovens without commercial-grade heat, but rotating the pizza 90 degrees halfway through the bake helps even it out.
How HellCrust Pizza's own dough practices back up this method
We test these principles ourselves, watching preheat times and surface temperatures the same way this guide describes, because a crust either performs under real heat or it doesn't. There's no shortcut around thermal mass and hydration, no matter how good the toppings are.
- HellCrust's Biga multigrain dough relies on a slow, cold preferment process, the same principle behind the fermentation guidance above: more time develops more flavour and a more even, crisp structure.
- Our dough is built additive free, meaning the crumb and crust behaviour you see in testing reflects flour, water, salt, and yeast alone, not dough conditioners masking a shortcut. You can read more on what makes pizza dough additive free if you're curious how that changes handling.
- For readers who want to go further into fermentation and proofing timing generally, this proofing guide covers timelines that apply well beyond pizza dough specifically.
- Anyone wanting the deeper story on why we build dough around a Biga starter in the first place can find it in our piece on Biga dough.
What the conventional pizza advice gets wrong
Most advice on crispy pizza obsesses over dough recipes and ignores the oven entirely, which is backwards. A brilliant 65% hydration dough baked on an underheated stone will still come out pale and chewy on the bottom, because the surface never got hot enough to trigger real browning in the time the pizza spends in the oven.
The bigger problem is how much home cooking content assumes you own professional equipment. A wood-fired oven running at 800°F doesn't need the same workarounds a standard home oven does, but nearly every recipe borrows its timing from that world anyway. The sheet pan and cast iron combination isn't a lesser method. It's a legitimate answer to a real constraint, and it deserves to be treated as a primary technique rather than a footnote.
If there's one thing to prioritize above all else, it's preheat time over ingredient perfectionism. A 45 minute wait with an ordinary dough beats a flawless dough on a cold surface every time.
Get extra crispy pizza delivered without any of the oven work
If reading all this makes you want the result without the preheating, the dough math, or the broiler-watching, HellCrust Pizza already does that thermal and hydration work on your behalf, every single order.

Our Biga multigrain, additive free dough goes through the same slow fermentation this guide recommends for flavour and crumb structure, then gets baked in ovens built for consistent, high heat recovery between pies, the exact recovery window home ovens struggle to match. You get the crisp, well done bottom this whole guide is about, minus the hour of preheating and the risk of a burnt broiler finish on a Tuesday night. Whether you're feeding a family with a mix and match deal or just want one reliably crisp pie without touching your own oven, order through HellCrust Pizza and check what's available for delivery or pickup near you tonight.
Frequently asked questions about extra crispy pizza
What's the single best upgrade for a crispier pizza crust? A baking steel, preheated 45 to 60 minutes at your oven's maximum temperature. It reaches the browning threshold on the dough's underside far faster than a stone or sheet pan.
Can I get an extra crispy pizza without a pizza stone or steel? Yes. Preheat a metal half sheet pan for 15 minutes, bake as normal, then finish the bottom in a dry, hot cast iron skillet on the stovetop for about 2 minutes.
What hydration percentage makes the crispiest pizza dough? 60 to 65% hydration gives a foldable, crisp outer shell that's manageable for most home cooks. Around 70% produces an even crisper exterior but is harder to shape without practice.
Why does my pizza come out crispy but goes soft a few minutes later? Resting it on a plate or cutting board traps steam underneath the crust. Rest it on a wire cooling rack instead for 2 to 3 minutes before slicing.
Does cold fermenting the dough actually make it crispier? Cold fermentation for 24 to 48 hours develops more complex flavour and a slightly more open crumb structure, which tends to crisp more evenly than same-day dough, though a hot enough surface matters more than fermentation time alone.
Sources
A handful of sources shaped the specific timings and equipment guidance throughout this piece, and they're worth reading directly if you want the fuller technical picture.
- The trick for the crispiest pizza at home | Simply Recipes
- Pizza stone vs steel: Which one belongs in your oven | The Pizza Craft
- Pizza dough hydration guide | JayArr Pizza
- Baking steel vs baking stone | Serious Eats